Lesson 4: tile-based processing
Authors: Yingchu Hu, Su Ye
Time series datasets: Harmonized Landsat-Sentinel (HLS) datasets
Application: General disturbance mapping, Hangzhou, China
This tutorial will guide you through processing HLS imagery data using pyxccd to generate annual disturbance maps, recent disturbance maps, and first disturbance maps. The workflow consists of three main steps.
Step 0: preparation
1. Install Pyxccd
pip install pyxccd
2. Prepare HLS images
HLS_root_directory/
└── Tile_ID (e.g., 51RTP)/
    └── HLS_daily_folder (e.g., HLS.S30.T51RTP.2021238T023551.v2.0)
        └── HLS_image_files (e.g., HLS.L30.T51RTP.2021238T023146.v2.0.B02.tif)
3. Configuration File
Prepare config_hls.yaml with adjustable block size parameters
(example uses 30×30 blocks):
DATASETINFO:
  n_rows: 3660
  n_cols: 3660
  n_block_x: 30
  n_block_y: 30
Step 1: image preprocessing
Purpose
Stack HLS images in time series for subsequent change detection.
Procedure
Adjust the configuration in config.yaml as needed
CD to the folder
pyxccd\tutorials\notebooksand run stacking script:
python prepare_ard.py --source_path /path/to/HLS_root_directory/Tile_ID \
                     --yaml_path /path/to/config.yaml \
                     --out_path /path/to/stack/data \
                     --low_date_bound 2019-01-01 \
                     --upp_date_bound 2024-12-31 \
                     --n_cores 16
Parameters
--source_path: HLS data directory (HLS/51RTP)
--yaml_path: Configuration file path
--out_path: Output directory for stacked data
--low_date_bound: Start date (YYYY-MM-DD)
--upp_date_bound: End date (YYYY-MM-DD)
--n_cores: The total cores assigned
Output
The output directory (stack by default) will contain
{TileID}_stack folders with block-organized stacked data for each
tile.
Step 2: break detection
SCCD Algorithm:
Purpose
Detect breaks at a per-pixel level using pyxccd’s SCCD algorithm.
Procedure
Complete the stacking process (Step 1)
Run SCCD detection script:
python tile_processing.py --method SCCDOFFLINE \
                     --stack_path /path/to/stack/data \
                     --yaml_path /path/to/config.yaml \
                     --result_path /path/to/sccd_results \
                     --low_datebound 2019-01-01 \
                     --upper_datebound 2024-12-31 \
                     --n_cores 16
Parameters
--stack_path: Stacked data directory from Step 1
--result_path: Output directory for SCCD results
(Other parameters same as Step 1)
Output
The output directory (sccd_results by default) will contain:
record_change_x{blockX}_y{blockY}_sccd.npy: Change detection results per block
SCCD_block{blockID}_finished.txt: Completion marker files
COLD Algorithm:
Purpose
Detect pixel-level changes using pyxccd’s COLD algorithm.
Procedure
Complete the stacking process (Step 1)
Run COLD detection script:
python tile_processing.py --method COLD \
                     --stack_path /path/to/stack/data \
                     --yaml_path /path/to/config.yaml \
                     --result_path /path/to/cold_results \
                     --low_datebound 2019-01-01 \
                     --upper_datebound 2024-12-31 \
                     --n_cores 16
or S-CCD
python tile_processing.py --method SCCDOFFLINE \
                     --stack_path /path/to/stack/data \
                     --yaml_path /path/to/config.yaml \
                     --result_path /path/to/cold_results \
                     --low_datebound 2019-01-01 \
                     --upper_datebound 2024-12-31 \
                     --n_cores 16
Parameters
--stack_path: Stacked data directory from Step 1
--result_parent_path: Output directory for COLD results
(Other parameters same as Step 1)
Output
The output directory (cold_results by default) will contain:
record_change_x{blockX}_y{blockY}_cold.npy: Change detection results per block
COLD_block{blockID}_finished.txt: Completion marker files
Step 3: disturbance map generation
Purpose
Convert change detection results into annual/recent/first disturbance maps.
Procedure
Complete Steps 1-2
Run disturbance mapping script:
COLD:
python export_change_map.py --source_dir /path/to/HLS_root_directory/Tile_ID \
                               --result_path /path/to/cold_results \
                               --out_path /path/to/disturbance_maps \
                               --method COLD \
                               --yaml_path /path/to/config.yaml \
                               --year_lowbound 2019 \
                               --year_uppbound 2024 \
                               --n_cores 16
S-CCD:
python export_change_map.py --source_dir /path/to/HLS_root_directory/Tile_ID \
                               --result_path /path/to/sccd_results \
                               --out_path /path/to/disturbance_maps \
                               --method SCCDOFFLINE \
                               --yaml_path /path/to/config.yaml \
                               --year_lowbound 2019 \
                               --year_uppbound 2024 \
                               --n_cores 16
Parameters
--source_dir: HLS directory (for spatial reference)
--result_path: SCCD or COLD results directory
--out_path: Output directory for disturbance maps
--method: SCCDOFFLINE or COLD
--year_lowbound: Start year
--year_uppbound: End year
--n_cores: The total cores assigned
Output
The output directory (disturbance_maps by default) will contain:
S-CCD:
{year}_break_map_SCCDOFFLINE.tif: Annual disturbance date and type map
first_disturbance_map_SCCDOFFLINE.tif: First disturbance map (year of first disturbance)
recent_disturbance_map_SCCDOFFLINE.tif: Recent disturbance map (year of latest disturbance)
COLD:
{year}_break_map_COLD.tif: Annual disturbance date and type map
first_disturbance_map_COLD.tif: First disturbance map (year of first disturbance)
recent_disturbance_map_COLD.tif: Recent disturbance map (year of latest disturbance)
Notes
For large areas, process tiles in batches to avoid memory overload
Adjust block size parameters in config_hls.yaml to balance speed and memory usage
Interrupted processing can be resumed - the script will skip completed blocks
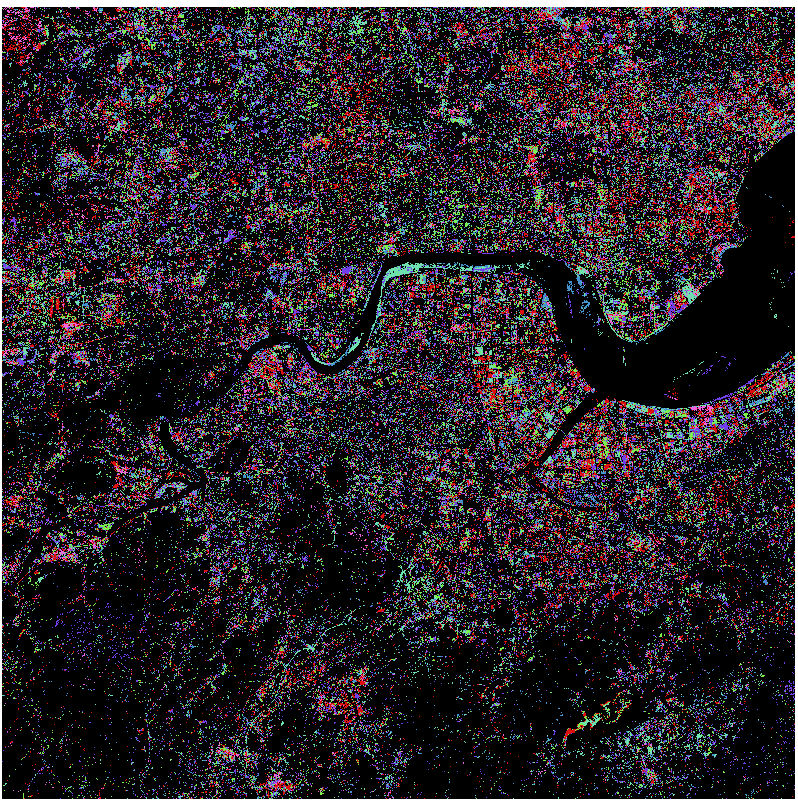
Result examples
First Disturbance Map (COLD):
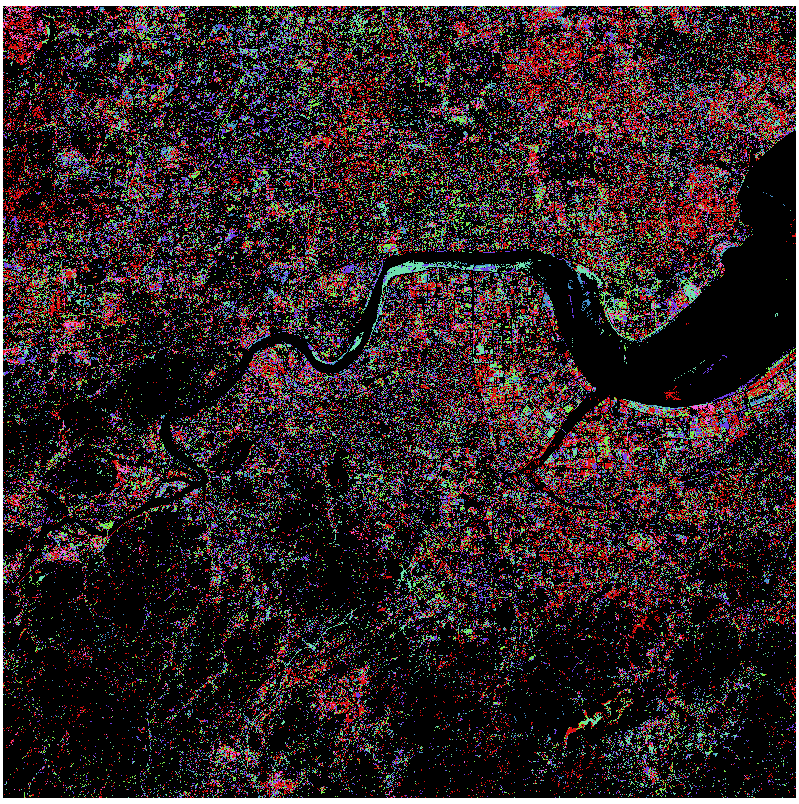
First Disturbance Map (SCCD):